To achieve the highest dynamic range on any camera, you should film at the base ISO of that specific sensor. If you go below the base ISO, you will clip your highlights resulting in a lower dynamic range. If you film above your base ISO, your picture becomes more grainy also resulting in a lower dynamic range.
The base ISO (in CLog 2 & 3) of the C200 = 800
Resulting in a dynamic range of 13.5 stops
Filming below ISO 800 is therefor never recommended. Filming above ISO 800 is sometimes necessary if your picture is still too dark after opening up your aperture.
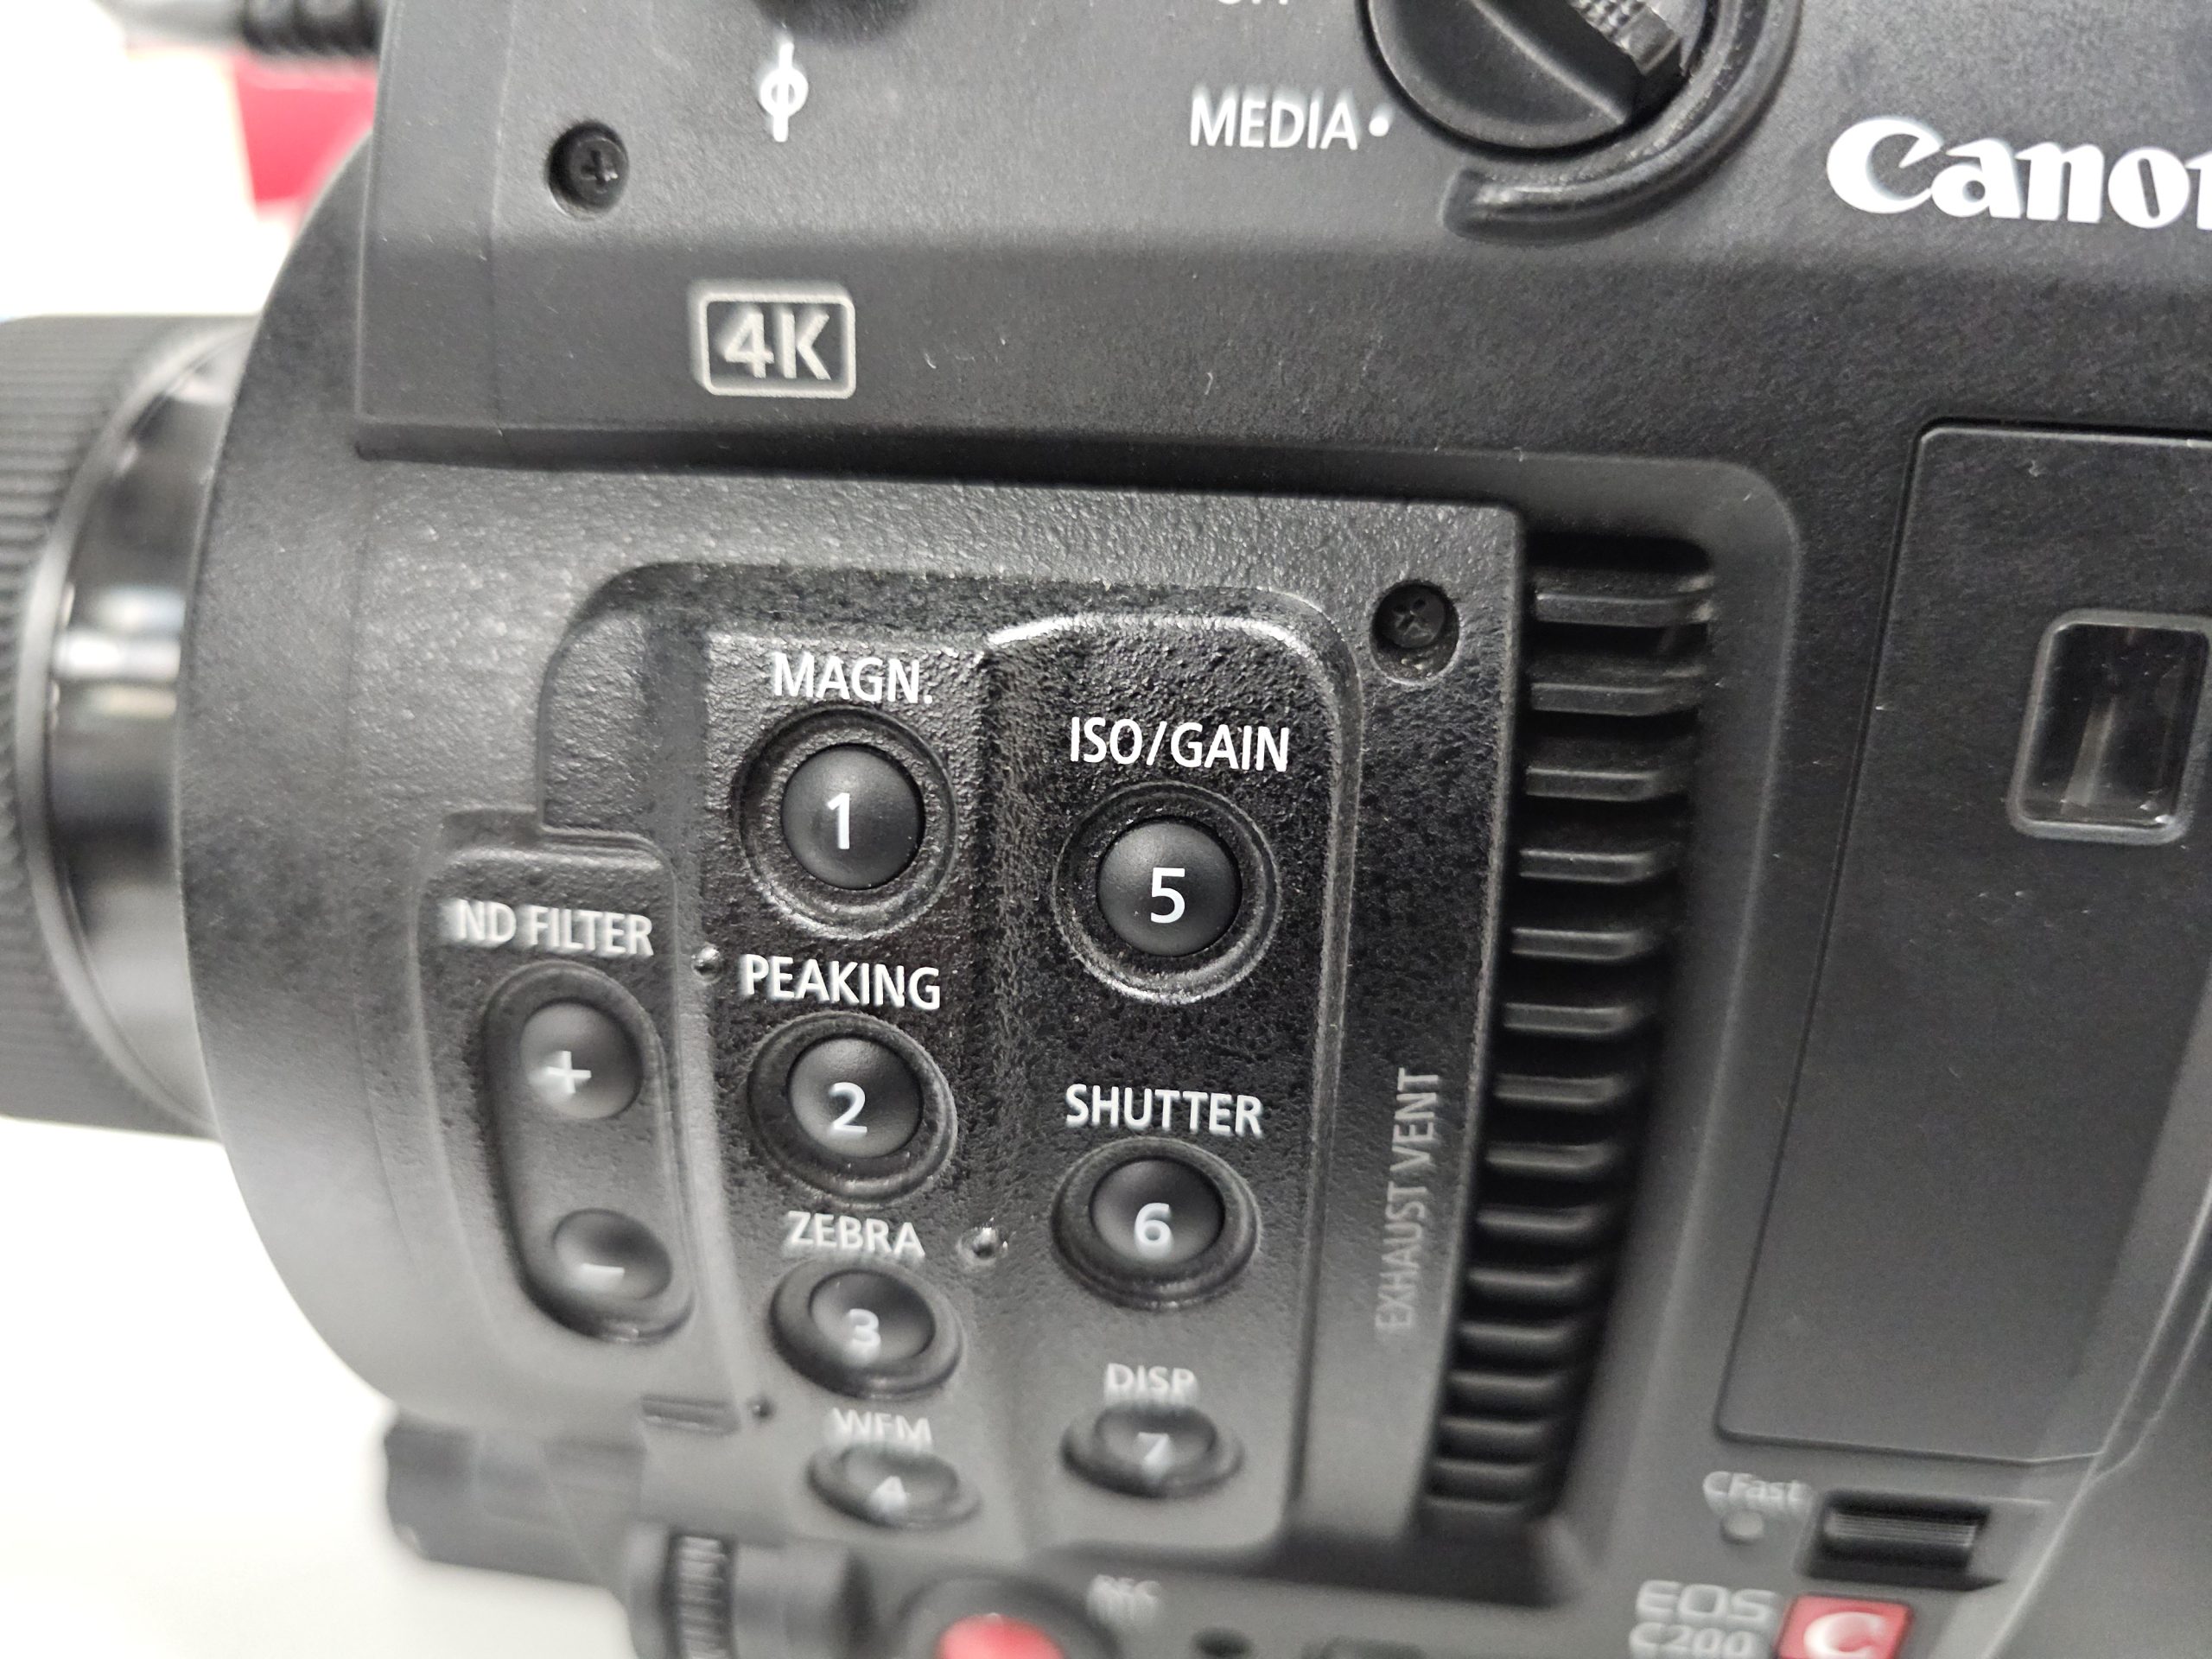
 Push the ISO/GAIN button on the left side of the camera. It’s a round button with the number 5 written on it. Once you’ve pressed this button you can change your ISO with the thumbstick on the monitor.
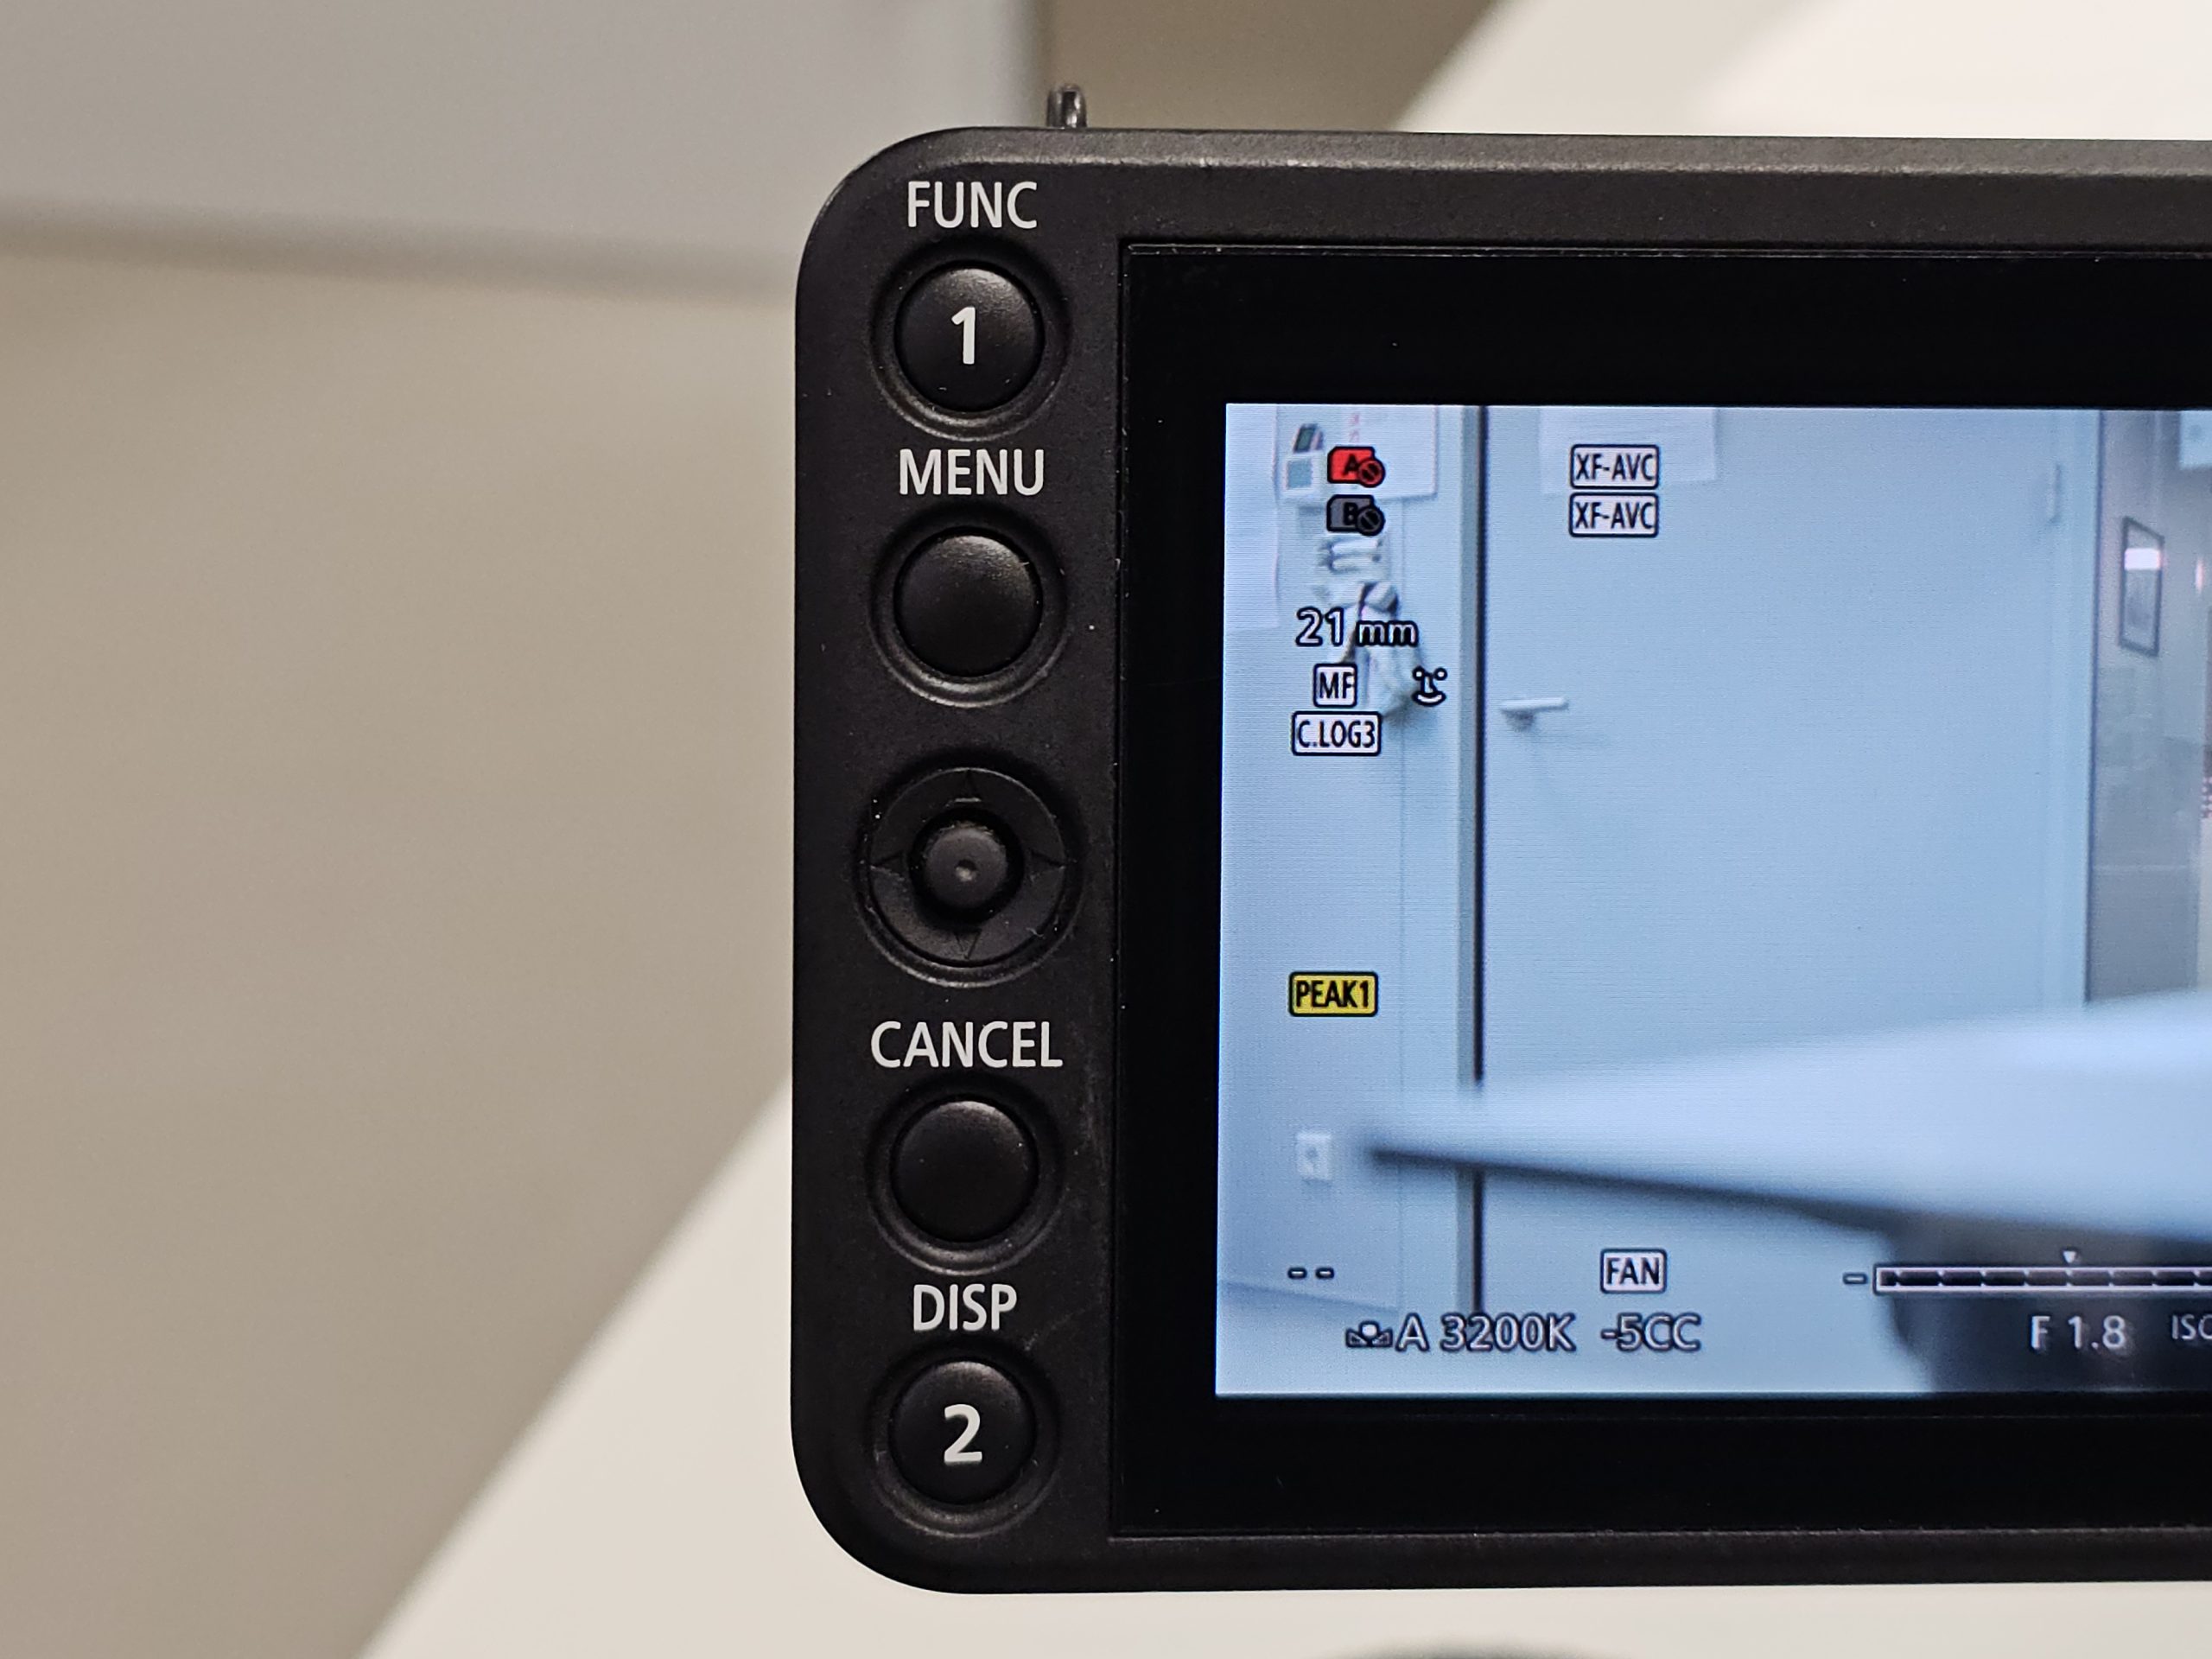
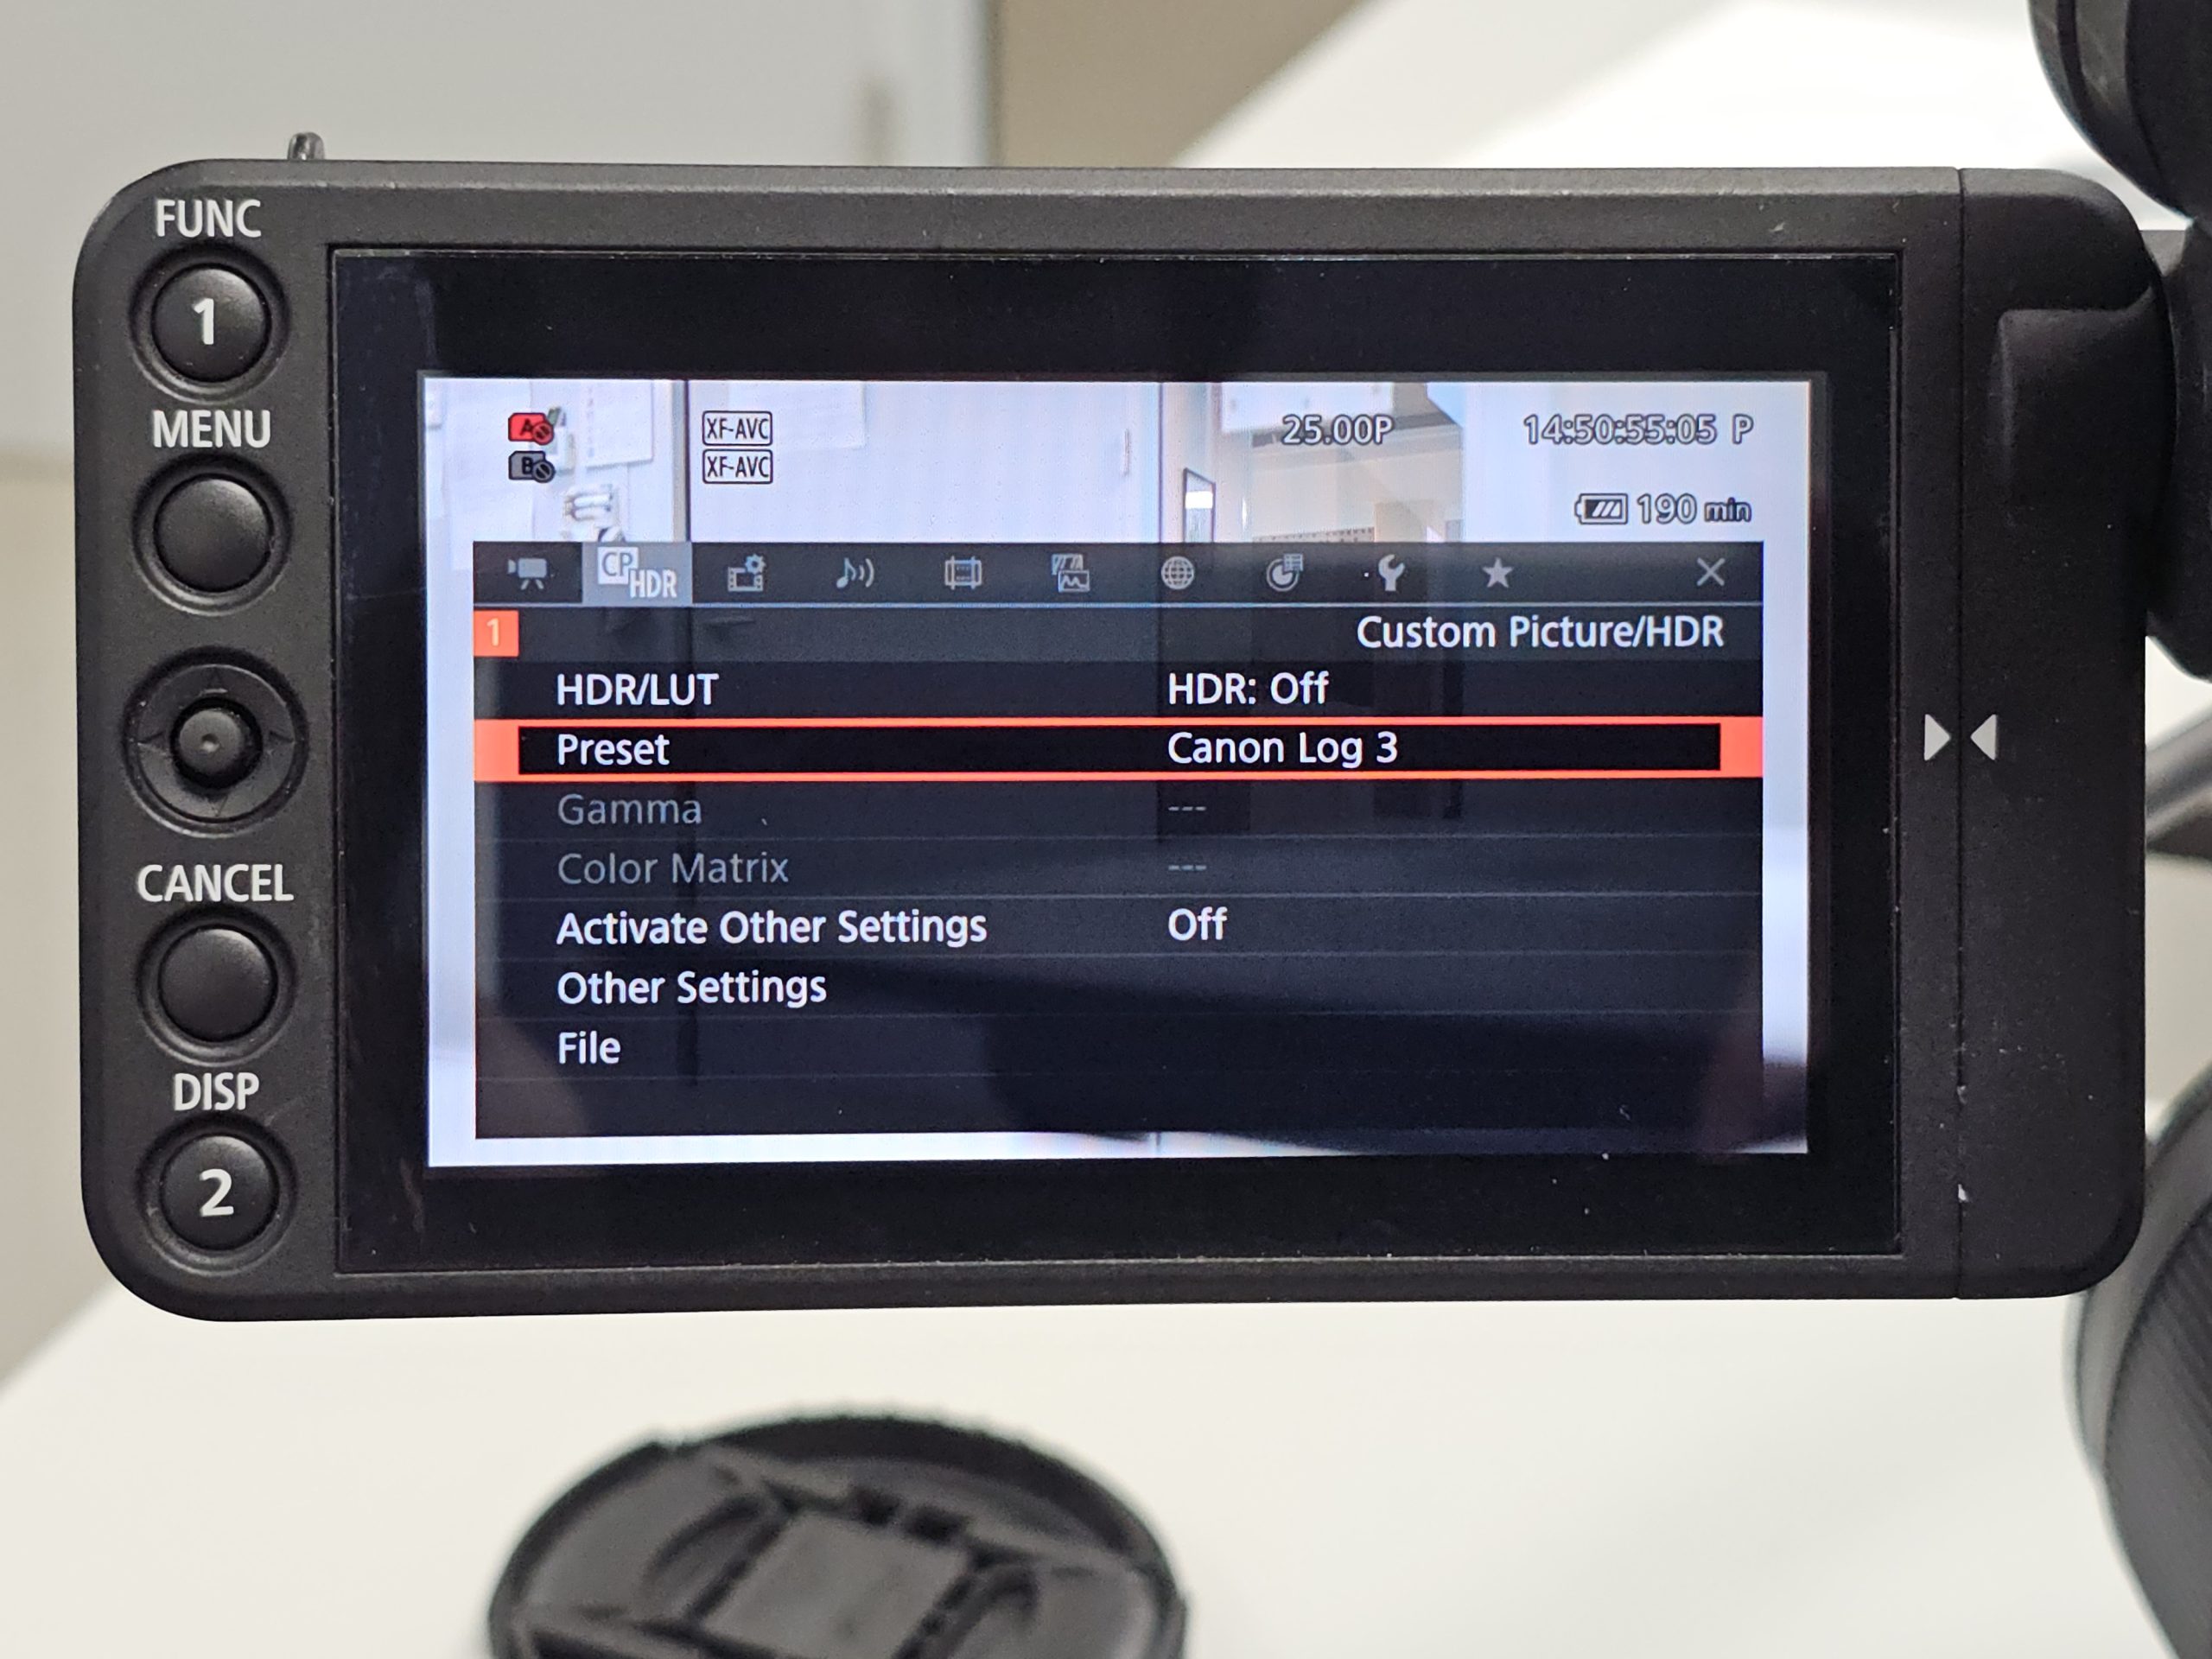 In order to get more flexibility during color grading it is recommended to shoot in Log profiles. The best Log profile on the C200 is Canon Log 3. To choose this option, press the menu button on the monitor. With the thumbstick navigate to the second menu tab with the CP HDR icon. In this tab change the Preset option to Canon Log 3.
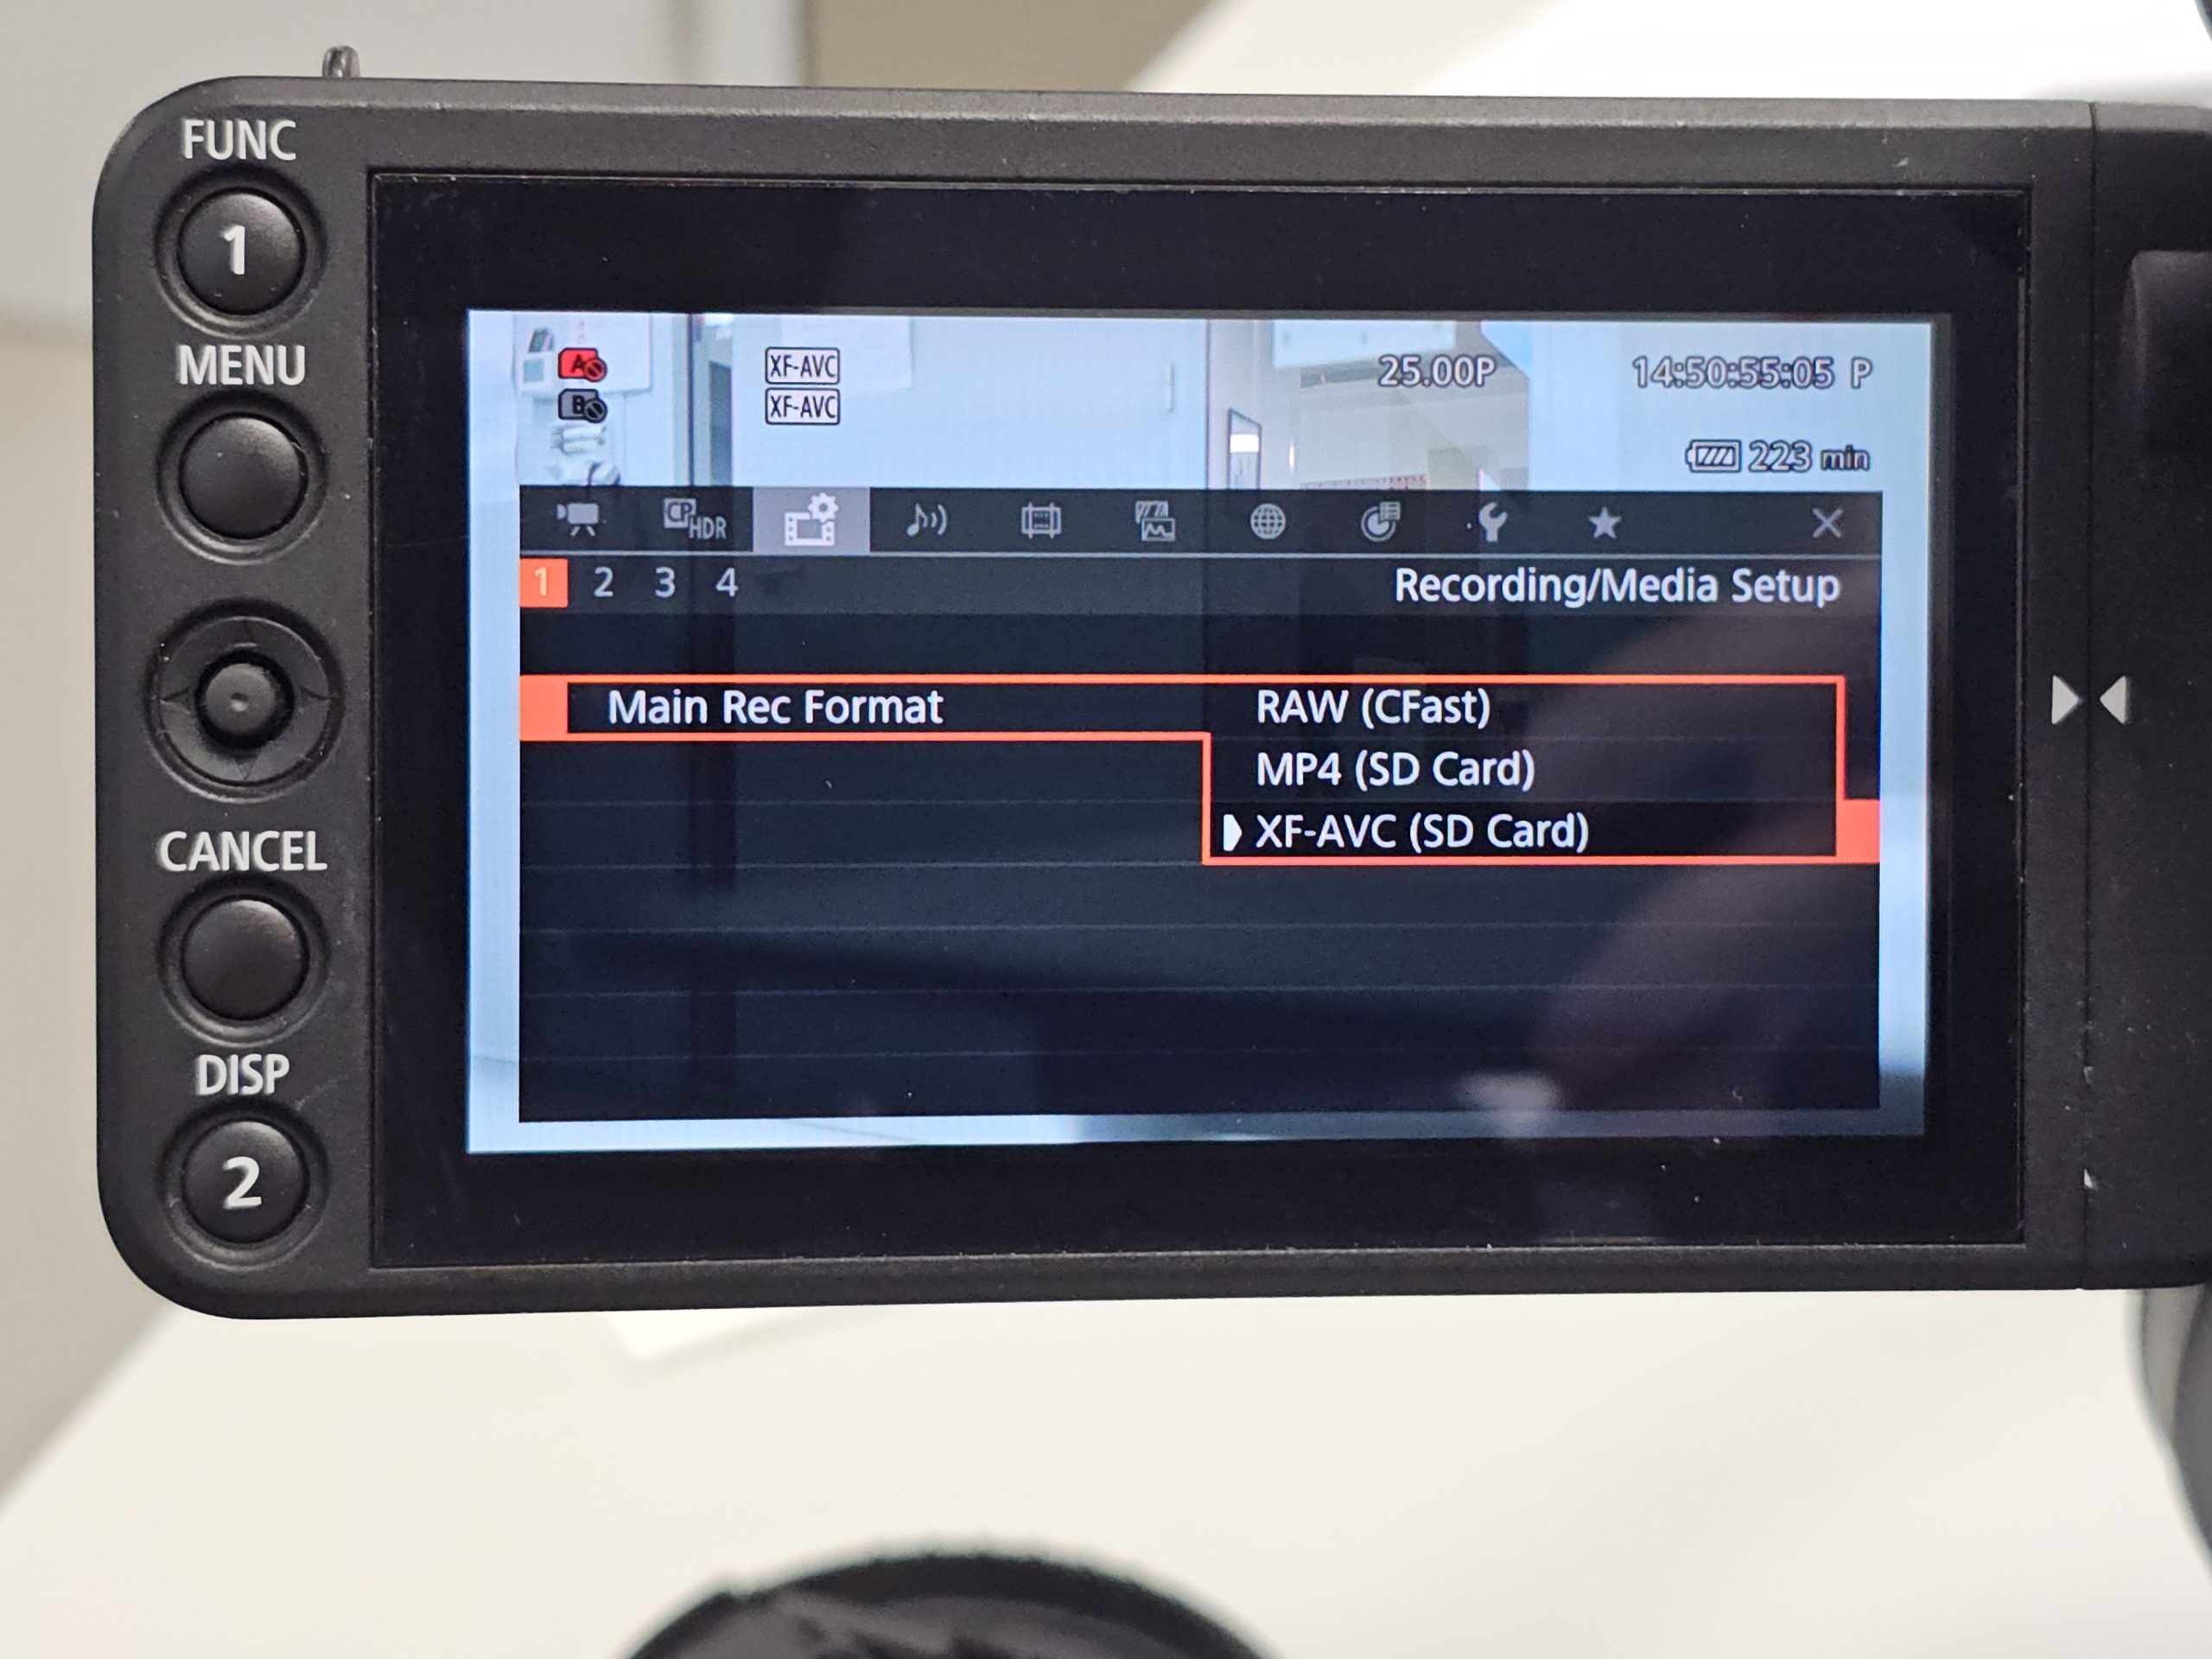 There are several media formats to choose from. In theory this camera can shoot RAW on Cfast cards, however we strongly discourage shooting in RAW because of the extremely large file sizes and expensive Cfast cards. That is why we recommend shooting in XF-AVC.
To select the XF-AVC format, go in the menu to the third tab called Recording/Media Setup. On the first page of the Recording/Media Setup tab there is an option called Main Rec Format. Change this format to XF-AVC.
 If you want release your documentary on television, we recommend shooting in 25p. This option is most versatile since you can easily convert to 50 interlaced when needed, while retaining the quality of progressive scan for festival releases.
Besides 25p we recommend filming in the camera’s highest resolution 3840×2160 (4k).
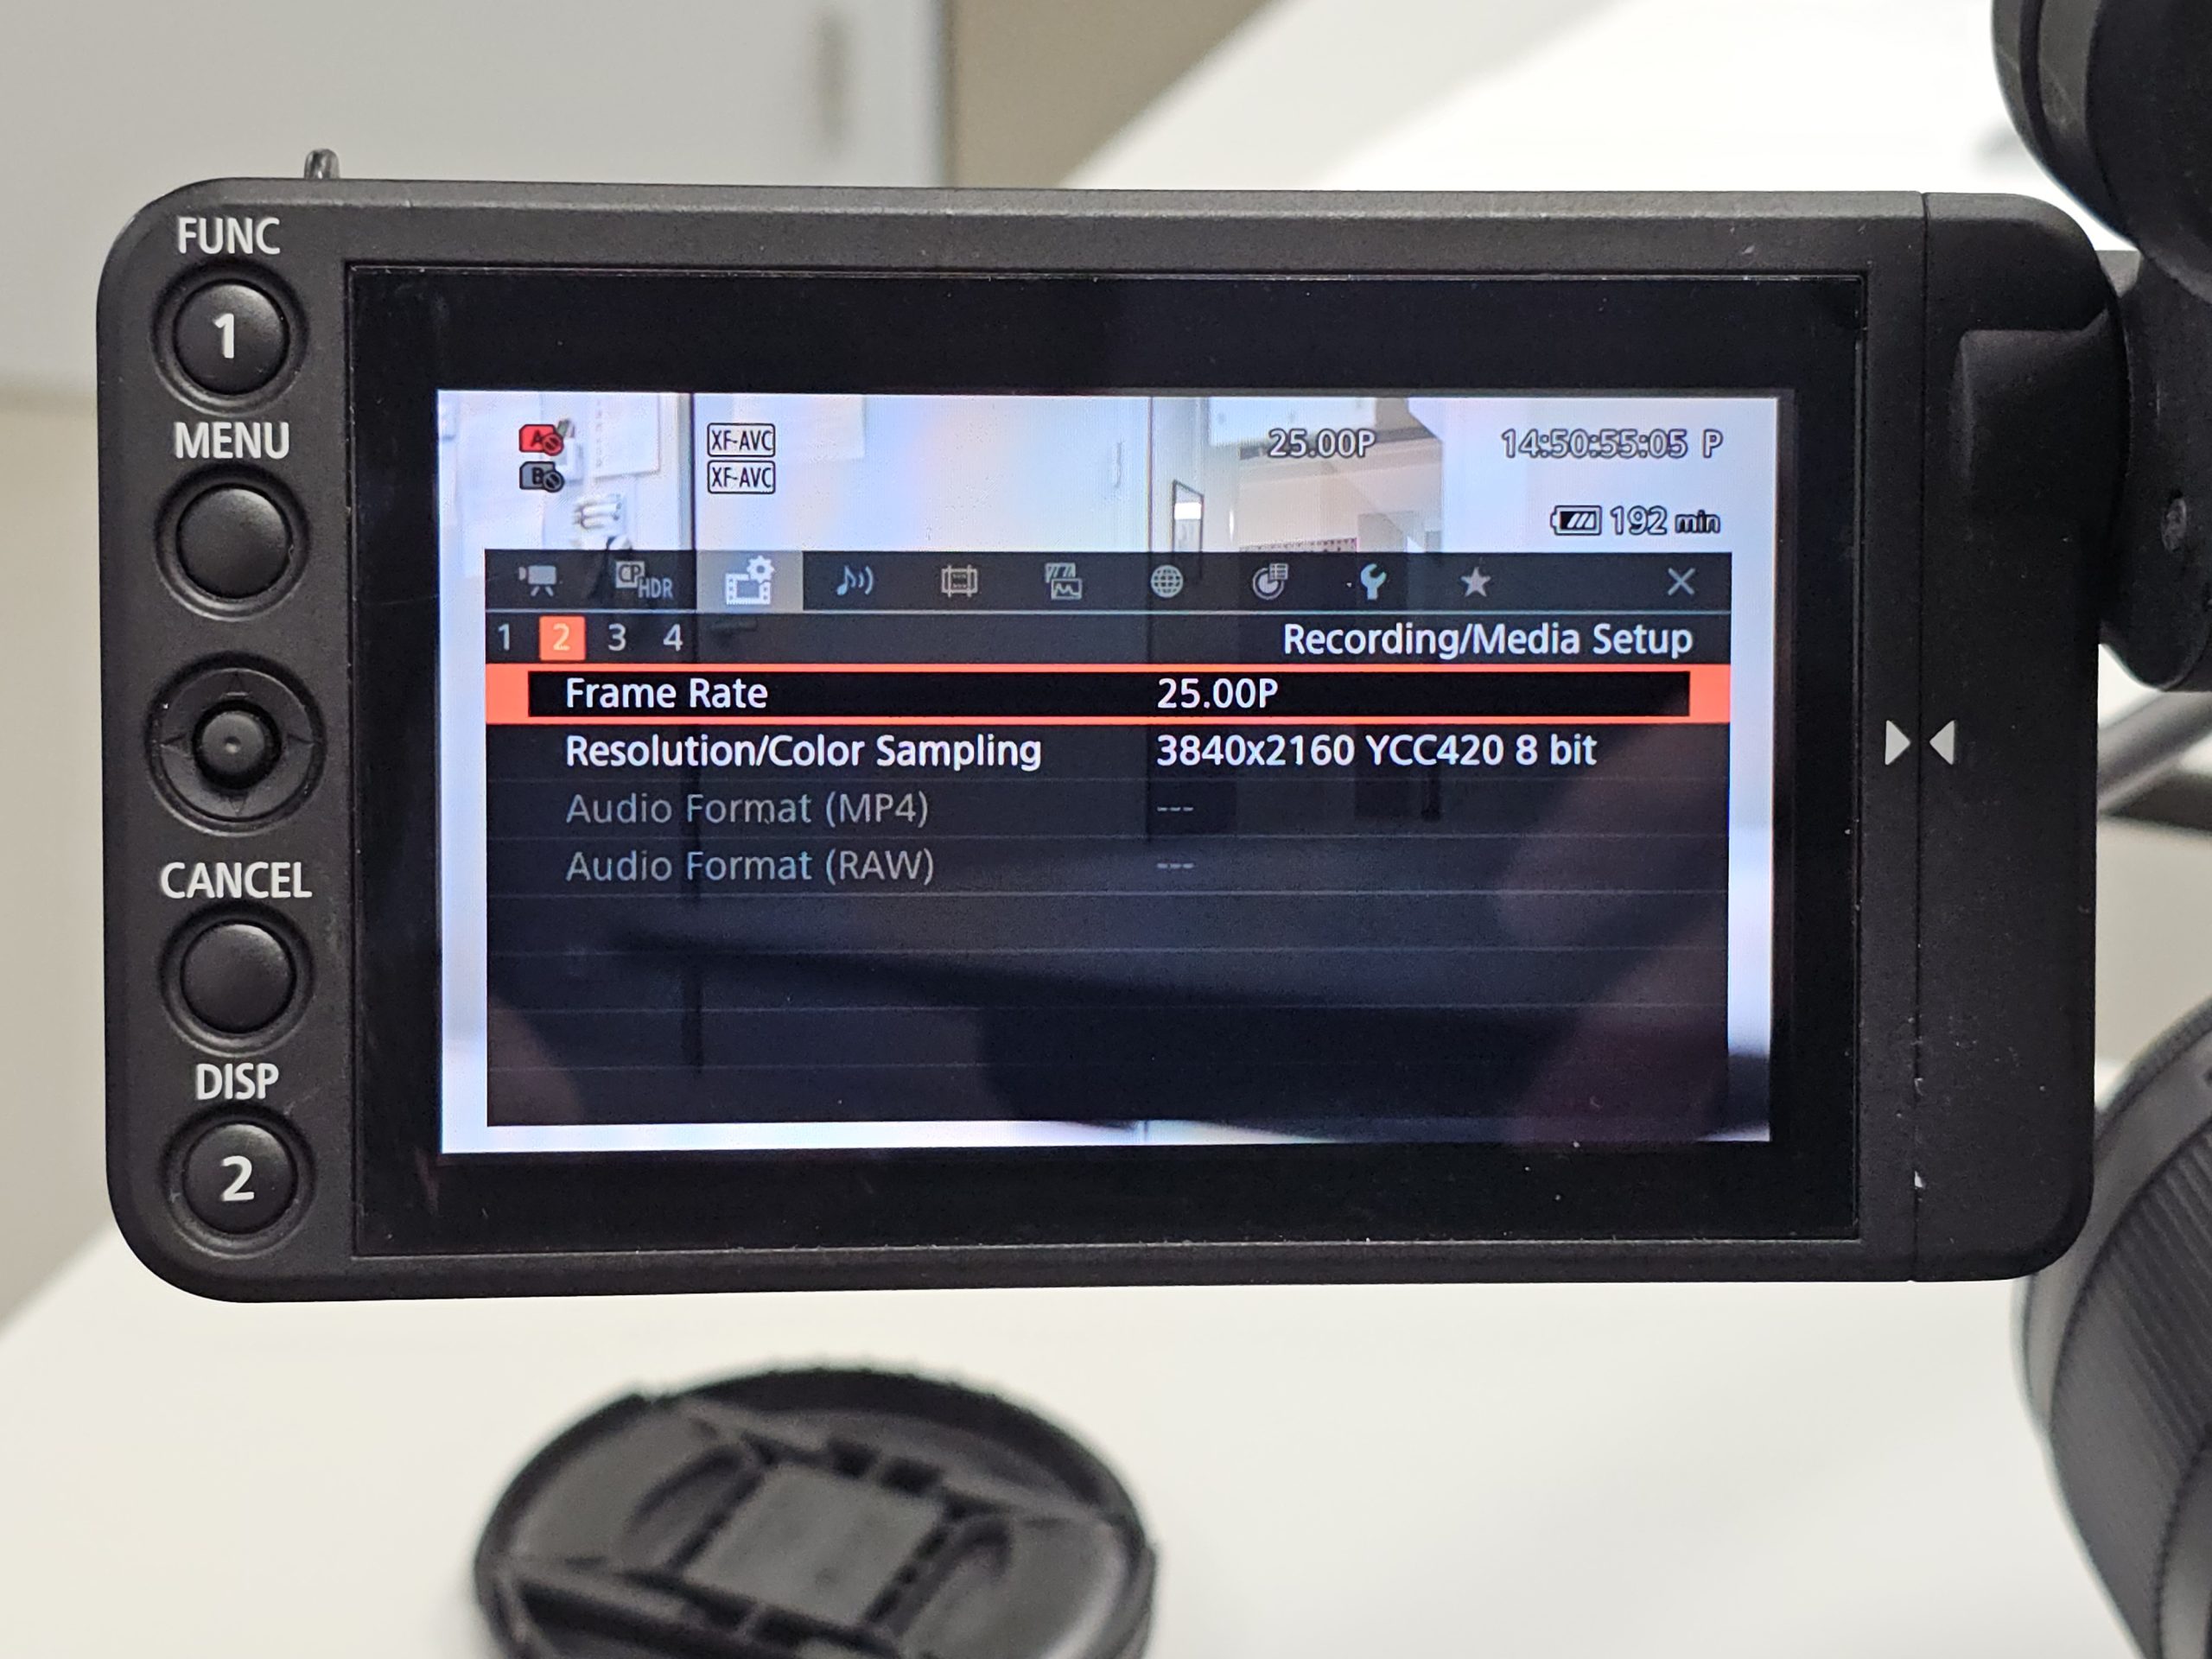
In the third menu tab called Recording/Media Setup, we can change both the frame rate and resolution. Go to the second page of the Recording/Media Setup tab. On this page select the Frame Rate option and change it to 25.00P. One spot below the Frame Rate option is the Resolution/Color Sampling option, change this to 3840×2160 YCC420 8 bit.